Running Source Code from Angel’s Textbook on a Windows PC
By Matt Evett, February 4, 2012
Here are the steps I took to get the code from the 6th edition of Angel’s Interactive Computer Graphics to run under Visual Studio 10 and Windows7. I was compiling and running example1.cpp from Chapter 2. The directions below have slight variants if you are running a 64-bit version of Windows (which you probably are).
Got OpenGL?
Windows7 should come with OpenGL already installed. To check, you should have the files named
/Windows/System32/opengl32.dll and (if you are running a 64-bit version of Windows) /Windows/SysWOW64/opengl32.dll
(I could not find an “opengl32.lib” anywhere in the filesystem. Some web pages refer to this, but those references must be for earlier versions of Windows.)
Getting Visual Studio
1) Download and install Visual Studio 10 Express (the free version). This should yield a new directory on your machine:
c:/Program Files (x86)/Microsoft Visual Studio
which includes a subdirectory that we'll be using later:
/Program Files (x86)/Microsoft Visual Studio/VC/include
I believe this also creates a new directory in your Documents folder: “Visual Studio 2010”. This contains a directory named “Projects”, which is where we’ll be putting much of our code. [By the way, the “(x86)” in the directory name indicates that this is a 32-bit program. The “VC” is for “Visual C” or “Visual C++”. I will use the abbrevation “VC” for the rest of this document.]
Getting freeglut
2) Download and decompress a binary/precompiled version of freeglut. The resulting directory, “freeglut” contains three directories of interest to us:
· freeglut/bin
· freeglut/include/GL
· freeglut/lib
We are going to move the contents of these three directories into three different locations.
3) Copy the contents of bin (i.e. freeglut.dll) into /Windows/System32 and, if you have a 64 bit version of Windows, into /Windows/SysWOW64
4) Copy freeglut/include/GL into /Program Files (x86)/Microsoft Visual Studio/VC/include/
This should create a directory named “GL” there, which contains four .h files. For example:
/Program Files (x86)/Microsoft Visual Studio/VC/include/GL/glut.h
5) Copy freeglut/lib/freeglut.lib into /Program Files (x86)/Microsoft Visual Studio/VC/lib. [You may see a “x64” directory. Ignore it, it contains the 64-bit version of freeglut, but we will stick with 32-bit for compatibility.]
Getting glew
6) Download and decompress the 32-bit version of glew binaries/precompiled (my version is glew-1.7.0). We follow a similar procedure as to installing freeglut, moving the contents of bin into where the other .dll files are, the includes into VC’s default location for .h files, and the lib files into VC’s lib directory. Here are the details:
Copy glew-1.7.0/bin/glew.dll and glew32mx.dll into into /Windows/System32/. If you have a 64-bit system, also copy them both into /Windows/SysWOW64/.
Copy the files in glew-1.7.0/include/GL (3 of them) into /Program Files (x86)/Microsoft Visual Studio/VC/include/GL
Copy the four files in glew-1.7.0/lib into /Program Files (x86)/Microsoft Visual Studio/VC/lib
Creating an OpenGL project in Visual C++
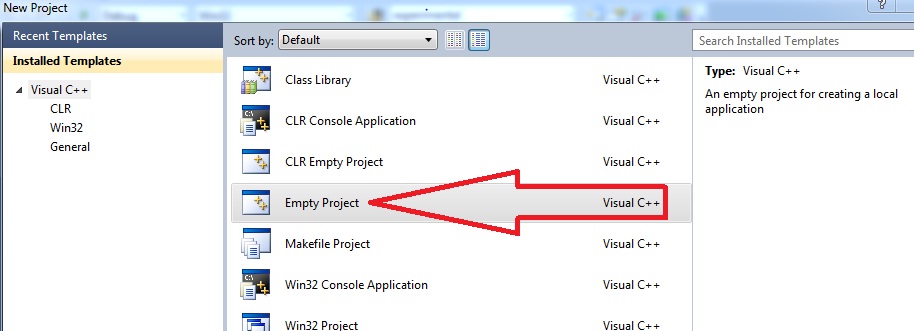
In Visual Studeio, create a new project. Make sure you create an “empty” project (in older versions of VC we created “console” applications, but not in this version.) I named the project “graphics1”, but you can call it anything you want.
The project should look something like this (except called "graphics2" will be whatever you used as the project's name:

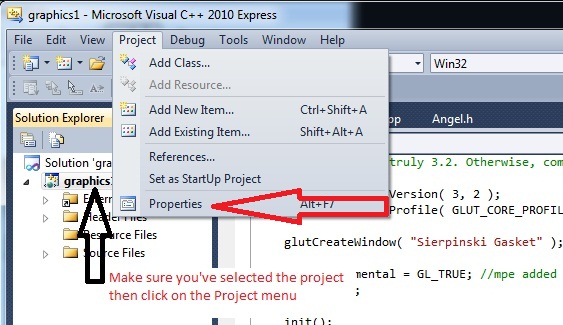
We need to tell VC to link the glew and glut libraries to our executable whenever we build the project. To do this, open the project's properties (menu item Project:Properties) like this (except you won't have the source code in the diagram):
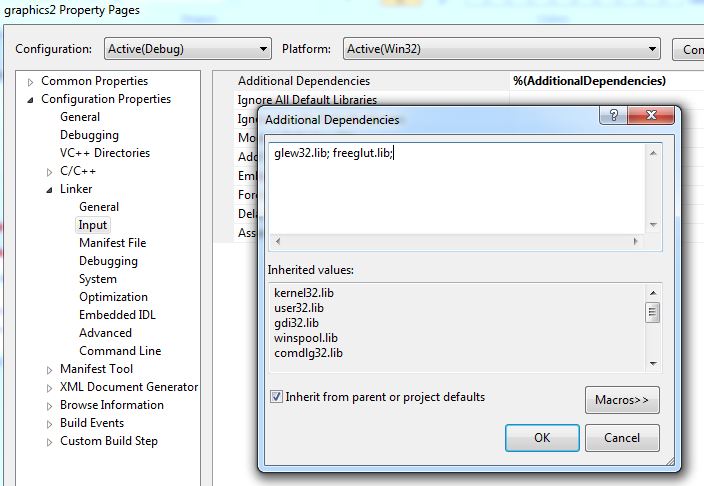
In the resulting Properties winow select Configuration Properties:Linker:Input, like this:
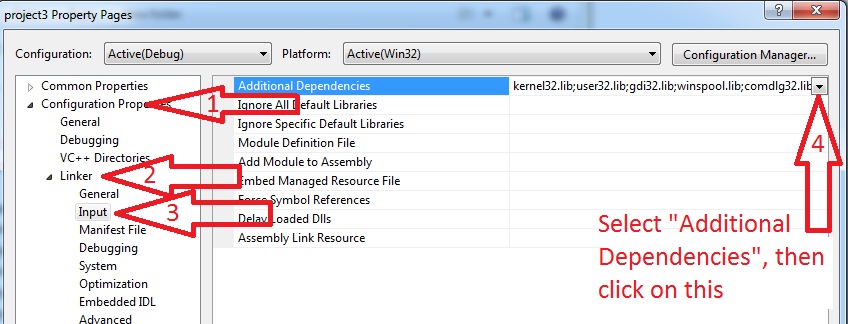
Click the "down arrow" icon at the list "Additional Dependencies" and then "Edit". In the resulting dialog box put
glew32.lib; freeglut.lib
Like this:
Now copy the your source code (including Angel’s .h files and InitShader.cpp) into the project’s folder. In my case this is
/Users/Matt/Documents/Visual Studio 2010/Projects/graphics1/
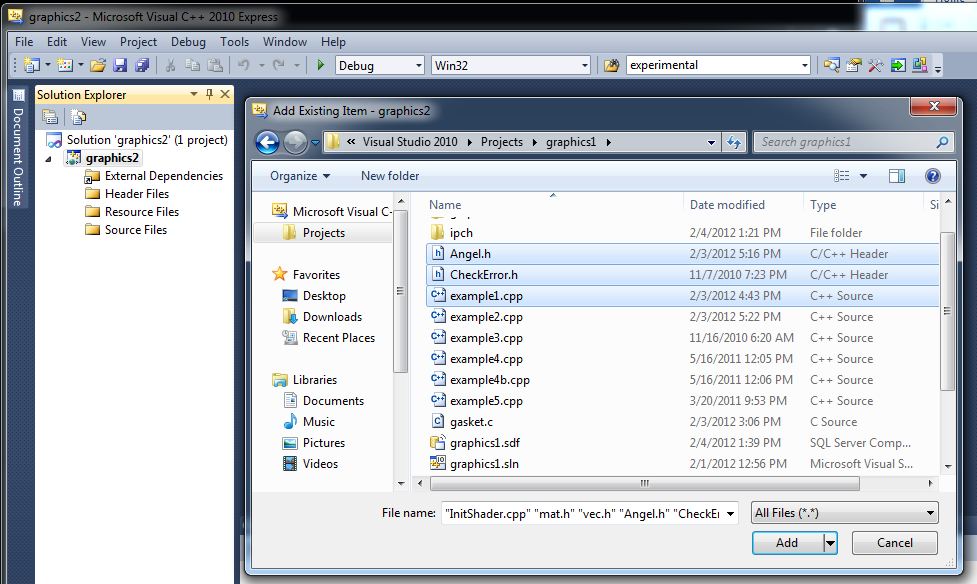
Now, in VC, use the Project menu's "Add Existing Items" command, and add the .h files, InitShader.cpp and example1.cpp to the project, like this:
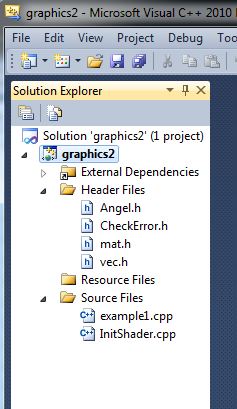
You should see the .h files in the “Headers” folder in the left (navigation) pane of VC, and InitShader.cpp and example1.cpp in the “Sources” folder, like this:
You should now be able to use the Project menu's "Build Solution" command. You’ll get a bunch of warnings about PDB files, but these can be ignored. [Visual Studio complains about "PDB" (program database) files because VC's debugger cannot find these files for the standard libraries. Such files would allow for debugging of the standard libraries, but we not editting those, so the debugging info is not needed.]
OK, if you try to run the project now via Project:Start Debugging you will may get this lovely error message:
Unhandled exception at 0x00000000 in graphics1.exe: 0xC0000005: Access violation.
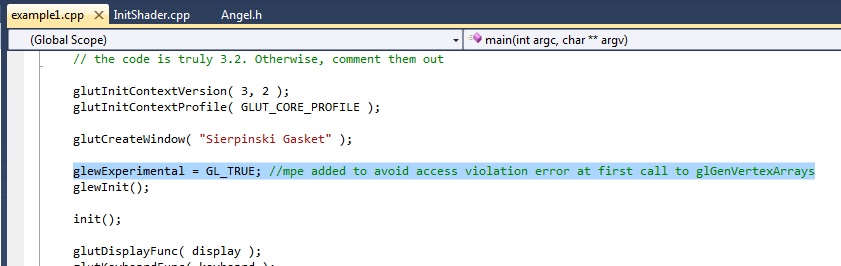
To get around this add the following “workaround” line before the first call to glewInit() in example1.cpp:
glewExperimental = GL_TRUE; //mpe added to avoid access violation error at first call to glGenVertexArrays
Here's what the code snippet looks like in main() of example1.cpp:
[Yes, this is a hack, but it works. Kudos to http://openglbook.com/glgenvertexarrays-access-violationsegfault-with-glew/ for identifying this! Evidently this is needed when your graphic drivers aren’t completely cooperating with GLEW.] OK, we try to build and run the application again, and the program will abort (but not crash! We’re getting there!) The problem, now, is that VC sets things up so that when your application tries to open the shader files, it can’t find them. I tried placing the .glsl files in the same directory as where VC places the .exe file, but that didn’t work. Instead, place them in the directory:
Documents/Visual Studio 2010/Projects/graphics1/graphics1
Yes, VC’s naming convention is redundant, but this makes things work. By the way, this is the directory containing graphics1.vcxproj.
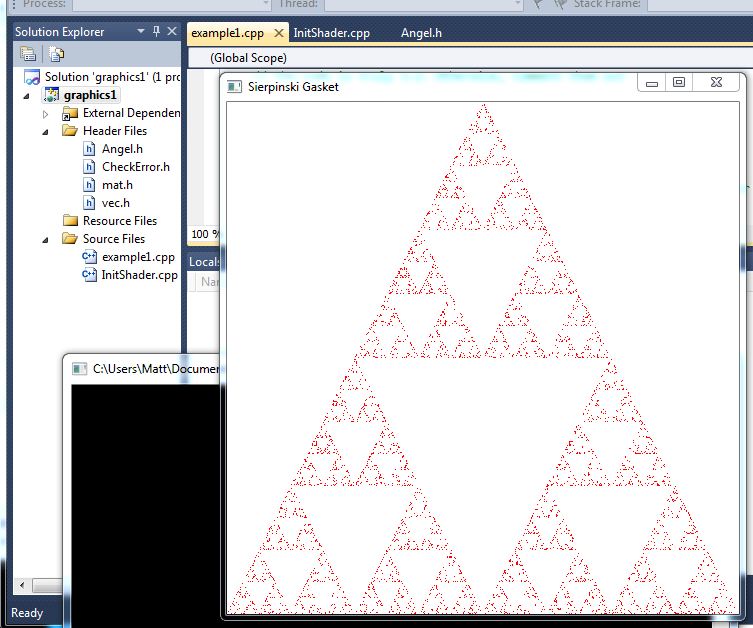
Build and run/debug your program and…..
SUCCESS!! [The crowd goes wild!]